10 minutes, less than 100 lines of scala, implement your own blog engine
This post inspired by Li Haoyi’s post, where he explains how to create a blog engine in Scala Script in 15 minutes.
In that blog post, Li Haoyi also showed that Scala used to be a tool to build serious enterprise, big data, machine learning business. With all of buzz words and projects that make up Scala ecosystem, new comer is less likely to feel comfortable, or willing to learn scala, because they think it’s difficult, but it’s really not (in some case).
Developers often express their works and life by writing blog, we’ve seen many blog engine written in php, python, or ruby or any programming language, and many people are currently using them. How’s about implement your own blog engine in 10 minutes, with less than 100 lines of scala code. This is a full working application, include HTML rendering, embeded server, markdown support, and built on akka toolkit ;).
Akka-Http
Akka-Http is a suilt of libraries support buiding http application server, and client. Because it is built on top of akka tookit, it’s super lightweight and fast, althought the current version is just experimental version, it will soon replace netty as main http server behind Play Framework.
Akka Http supports both Scala and Java, with its own DSL for both languages. To create a server using akka http, we just need to write 10 lines of codes (include defining main function):
def main(args: Array[String]) {
    implicit val system = ActorSystem()
    implicit val executionContext = system.dispatcher
    implicit val materializer = ActorMaterializer()
    val localRoute = get {
      path("/") {
        complete("Hello")
      }
    }
    Http().bindAndHandle(Route.handlerFlow(localRoute), "127.0.0.1", 8080)
  }
and you’re done running the most performance web server in scala world, is that easy? (in this blog post we won’t talk about what is behind server/libraries implementation, because it’s out of topic).
Actor system
An actor system manages the resources it is configured to use in order to run the actors which it contains. … Naturally, the exact order in which messages are processed in large systems is not controllable by the application author, but this is also not intended. - http://doc.akka.io/docs/akka/snapshot/general/actor-systems.html
because akka-http is heavily rely on actor and akka-stream, we need to create an actor system to manage actor resources. We usually create actor by this way, as in many documentation/example:
val actorSystem = ActorSystem("MyActorSystem")
val myActor = actorSystem.actorOf(Props(new SomeActor()), name = "myActor")

private class SomeActor() extends Actor {
    override def receive = {
       case x => println(x)
    }
}
in case we need to create many actors likes that, we will create too much actorSystem. Akka document notes:
An ActorSystem is a heavyweight structure that will allocate 1…N Threads, so create one per logical application.
so it’s better to create a singleton object and return actor system whenever we need it, we will talk about it later.
Writing your own blog engine
First 2 minutes
Decide our blog layout, how a link will be contructed, and how to route user’s request. I will use the same layout as my current blog, so we will have something likes this:
-
My First Post
-
My Second Post
-
My third post
-
…so on
With this layout, each line is local file name of blog post in filesystem, and these blog post will have following links:
-
/post/My_First_Post
-
/post/My_Second_Post
-
/post/My_third_post
We already have 2 routes, one for index page (/), and one for single posts (/post/), we may need another route, which will serve static request (css, js…), so we use /static
Next 3 minutes:
Creating file system layout
# this is command line (bash)
mkdir post
cd post
touch My First Post
touch My Second Post
touch My third post
Creating a central actor system, create a scala file named BlogActor.scala:
import akka.actor.ActorSystem

object BlogActor {
  private val system = ActorSystem("Blog")
  def getSystem: ActorSystem = system
}
Once we need actor system, we can call BlogActor.getSystem.
Scala has trait which can be mixed-in to other class, trait or class, we will create a Setting trait to mix into class/object that need to create configuration parameters.
Using akka-http, sbt will silently pull various dependecies from multiple repositories, which is needed by akka-http, include type safe config. This library bring us a very easy/convinience way to read configuration file, by its format, so we don’t need to use other configuration libraries.
We’re going to need 2 configuration directives for our blog: documentRoot and static_dir
To read configuration file, which can be placed anywhere you like, in this case, we place it in conf/application.conf, with content:
# application.conf
blog {
  root = "post"
  static_dir = "static"
}
Create a setting.scala and read config directive from our application, typesafe config also uses actor:
import com.typesafe.config.{Config, ConfigFactory}
import controller.BlogActor

trait Setting {
  implicit val system = BlogActor.getSystem
  private val configLoader: Config = ConfigFactory.load()
  val documentRoot: String = configLoader.getString("blog.root")
  val staticDir: String = configLoader.getString("blog.static_dir")
}
Construct akka-http routes for 3 route types we talked about:
import java.io.File

import akka.http.scaladsl.model.{ContentTypes, HttpEntity}
import akka.http.scaladsl.server.Directives._
import akka.http.scaladsl.server.Route
import model.{SinglePost, TotalPost}
import utils.Setting

object Routes extends Setting {
  val blog: Route = get {
    pathEndOrSingleSlash {
      encodeResponse {
	// TotalPost.index is the function where we implement our index page
        complete(HttpEntity(ContentTypes.`text/html(UTF-8)`, TotalPost.index))
      }
    }
  } ~ path("static"/ RemainingPath) { path =>
    encodeResponse {
      // this is where we place our static files, we only use css
      getFromFile(s"$staticDir/$path")
    }
  } ~ path("blog"/ RemainingPath) { path =>
    //SinglePost.gen is where we built single post page
    encodeResponse {
      complete(HttpEntity(ContentTypes.`text/html(UTF-8)`, SinglePost.gen))
    }
  }
}
Look at lines of code above, we create Routes object, which extends Setting trait, so it can read variables we defined in Setting.
We see that each akka-http route defines type of request method: get, path will be matched: pathEndOrSingleSlash, /static/..., and /blog/blogid.
Each routes will be concat together using route concatation: ~ method into a single blog Route
Minute 6 and 7: build index page
Index page lists all of our blog post, which is in this case, on of local files in local directory post. What we will gonna do is implement a simple function that show all the files, construct a HTML page with <a href=... tags. Here we go:
Create a file name TotalPost.scala, I think the code itself is self-explain: from all the files in directory post, replace file blank space in file name with _, concat with /blog/ to make blog’s url, with a very simple (simplist) HTML content
import java.io.File
import utils.Setting

object TotalPost extends Setting {
  def index = {
    new File(documentRoot).list().map { x => s"<li><a href=/blog/${x.replace(" ", "_")}> $x </a></li>"
    }.mkString(
      """<head><title>Simple</title>
        |</head><body><h1>Hung's Blog</h1>""".stripMargin, "<br>", "</body>"
    )
  }
}
Back to Server definition file, change its content to:
package controller

import akka.http.scaladsl.Http
import akka.http.scaladsl.server.Route
import akka.stream.ActorMaterializer

object Server {
  def main(args: Array[String]) {
    implicit val system = BlogActor.getSystem
    implicit val executionContext = system.dispatcher
    implicit val materializer = ActorMaterializer()
    Http().bindAndHandle(Route.handlerFlow(Routes.blog), "127.0.0.1", 8080)
  }
}
and we have this:
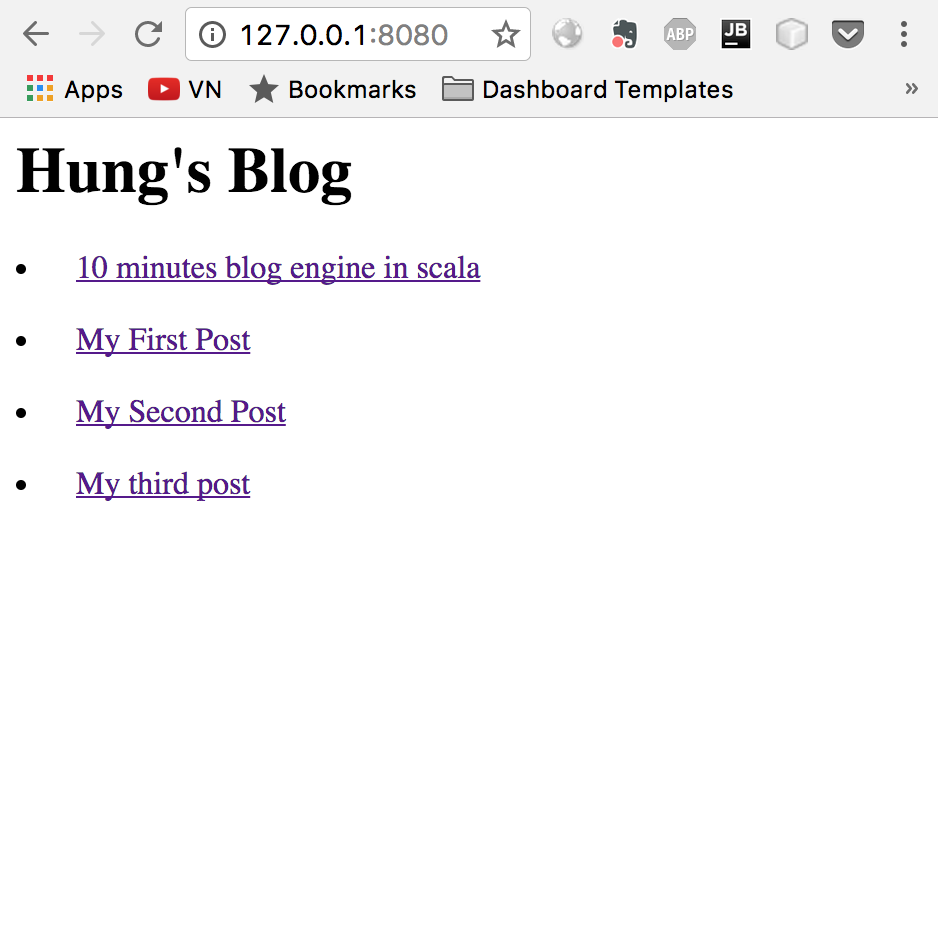
it’s ugly, thought. Add some css, change TotalPost.scala to:
package model

import java.io.File

import utils.Setting

object TotalPost extends Setting {

    def index = {
     new File(documentRoot).list().map { x => s"<li><a href=/blog/${x.replace(" ", "_")}> $x </a></li>"
    }.mkString(
      """<head><title>Simple</title>
        |<link rel="stylesheet" type="text/css" href='/static/style.css'>
        |</head><body><h1>Hung's Blog</h1>""".stripMargin, "<br>", "</body>"
    )
  }
}
create directory static, and add 4 lines of css in file style.css:
a {
    text-decoration: none;
    color: #f66;
}
Result:

Minute 8 and 9: Build single post page
A single post page is local file content, with markdown suport. It means we write blog in markdown syntax, and render to HTML using a library, we will going to use a library to generate Markdown -> HTML on server side. I use pegdown. Using pegdown is pretty easy, we create a PegDownProcessor instance, and calling markdownToHtml method with blog content as input parameter. Here we will create a new Markdown class for our blog engine, in a new file Markdown.scala:
import org.pegdown.{Extensions, PegDownProcessor}

object Markdown {
  def apply(timeout: Int = 2000, content: String): Markdown = new Markdown(timeout, content)
  class Markdown(timeout: Int, content: String) {
    def toHtml: String = new PegDownProcessor(Extensions.NONE |
      Extensions.DEFINITIONS |
      Extensions.TABLES |
      Extensions.FENCED_CODE_BLOCKS, timeout).markdownToHtml(content)
  }
}
You can see class Markdown is wrapped inside Markdown object, in scala world, it’s called companion object, where they can access private variable/method of each other. To use new Markdown instance, we will call:
Markdown("# Some String").toHtml
with default parsed timeout 2000 ms
A post is just a file, with its content is read then pass to Markdown toHtml function, and return to user space
//SinglePost.scala

import java.io.File
import utils.{Markdown, Setting}
import scala.io.Source

object SinglePost extends Setting {
  def gen(id: String) = {
    new File(documentRoot).list().find(x => x.replace(" ", "_") == id) match {
      case Some(p) => s"""<html><head><title>${id.replace("_", "")}</title>
	<link rel="stylesheet" type="text/css" href='/static/style.css'>
        </head>
	<body><h1 href="#" rel="no-refresh">$p</h1><div class="content"
        ${Markdown(content = Source.fromFile(s"$documentRoot/$p").getLines() mkString "\n").toHtml}
        </div>
        </body></html>"""
      case None => "Not found"
    }
  }
}
it’s similar to index page, accept we wrap it in div tag with class="content" to beautify post content by some css lines, add these lines above to style.css (we created before):
.content {
    background-color: #fff;
    box-shadow: 0 2px 10px rgba(0, 0, 0, .15);
    overflow: hidden;
    position: relative;
    font-family: 'Roboto', Helvetica, Arial, sans-serif;
    color: #000;
    font-size: 14px;
    font-weight: 500;
    position: relative;
    z-index: 1;
    margin: 30px 70px 30px auto;
    padding: 30px;
    box-sizing: border-box;
}
our blog will be like this:

Last minute: give it some color - Bootstrap
Boostrap give us an easy way to make up html element just by include css/js file into our page, we can give our blog post some basic coloring using bootstrap, modify SinglePost.scala and add bootstrap.min.js boostrap.min.css:
import java.io.File
import utils.{Markdown, Setting}
import scala.io.Source
object SinglePost extends Setting {
  def gen(id: String) = {
    new File(documentRoot).list().find(x => x.replace(" ", "_") == id) match {
      case Some(p) => s"""<html><head><title>${id.replace("_", "")}</title>
            <link rel="stylesheet" type="text/css" href='/static/style.css'>
            <link rel="stylesheet" href="https://maxcdn.bootstrapcdn.com/bootstrap/3.3.7/css/bootstrap.min.css" integrity="sha384-BVYiiSIFeK1dGmJRAkycuHAHRg32OmUcww7on3RYdg4Va+PmSTsz/K68vbdEjh4u" crossorigin="anonymous"></head>
            <body><h1 href="#" rel="no-refresh">$p</h1><div class="content"
        ${Markdown(content = Source.fromFile(s"$documentRoot/$p").getLines() mkString "\n").toHtml}
        </div>
        <script src="https://maxcdn.bootstrapcdn.com/bootstrap/3.3.7/js/bootstrap.min.js" integrity="sha384-Tc5IQib027qvyjSMfHjOMaLkfuWVxZxUPnCJA7l2mCWNIpG9mGCD8wGNIcPD7Txa" crossorigin="anonymous"></script>
        </body></html>"""
      case None => "Not found"
    }
  }
}

total line of code we’ve written:
--------------------------------------------------------------------------------
 Language             Files        Lines        Blank      Comment         Code
--------------------------------------------------------------------------------
 Scala                    7          111           16            0           95
--------------------------------------------------------------------------------
 Total                    7          111           16            0           95
--------------------------------------------------------------------------------
Conclusion:
In this post we explore the way a simple scala web application can be built, and how simple is it. Scala is a programming language, when you give it a little time, you can learn and use it just like the way you learn other programming languages. The thing we’re talking about is a simplest way to build blog engine, in case you want to make a backup on your blog posts on GitHub, or make it Single page application, take a look at my blog source code, it was built using same style, same libraries and architect.